MariaDB HA之Galera集群
MariaDB HA之Galera集群
功能简介
特性
- 真正的多主架构,任何节点都可以进行读写
- 同步复制,各节点间无延迟且节点宕机不会导致数据丢失
- 紧密耦合,所有节点均保持相同状态,节点间无不同数据
- 无需主从切换操作或使用VIP
- 热Standby,在Failover过程中无停机时间(由于不需要Failover)
- 自动节点配置,无需手工备份当前数据库并拷贝至新节点
- 支持InnoDB存储引擎
- 对应于透明,无需更改应用或是进行极小的更改
- 无需进行读写分离
原理简析 当一个事务在当前写入的节点提交后,通过wsrep API(write set replication API)将这个事务变成写集(write set)广播到同集群的其他节点中,其他节点收到写集事务后,对这个事务进行可行性检查,并返回结果给wsrep API。 若大多数节点都预估自己可以成功执行这个事务,则wsrep API会做出仲裁,通知所有可以成功执行这个事务的节点提交这个事务,并将事务成功提交的消息返回给客户端,同时根据需要剔除没有成功执行事务的节点
galera共享库 galera本身是作为一个插件式的共享库文件,MySQL通过调用galera写集复制API挂钩,获得galera集群特性。
galera共享库组成部分 galera库是一个提供准备,复制,应用写集事务功能的协议栈,其重要组成部分为:
wsrep API:写集复制功能组件,负责提供关系型数据库管理与复制服务,定义接口 wsrep hooks:在数据库引擎中的集成写集组件 Gelera Provider:将共享库转化为wsrep API Certification Layer:保护写集并完整性,验证写集完整性 replication:管理复制协议,提供完整的指令系统 GCS framwork:为集群组通信提供插件架构
主机准备
| 节点 | IP | VIP | 角色 |
|---|---|---|---|
| mariadb1 | 172.16.10.11 | MariaDB-10.3,galera | |
| mariadb2 | 172.16.10.12 | MariaDB-10.3,galera | |
| mariadb3 | 172.16.10.13 | MariaDB-10.3,galera | |
| lvs1 | 172.16.10.14 | 172.16.10.10 | HAProxy,Pacemaker |
| lvs2 | 172.16.10.15 | HAProxy,Pacemaker |
配置hosts
1cat > /etc/hosts <<EOF
2127.0.0.1   localhost localhost.localdomain localhost4 localhost4.localdomain4
3::1         localhost localhost.localdomain localhost6 localhost6.localdomain6
4172.16.10.11 mariadb1
5172.16.10.12 mariadb2
6172.16.10.13 mariadb3
7172.16.10.14 lvs1
8172.16.10.15 lvs2
9EOF
安装MariaDB
MySQL跟MariaDB的Galera集群配置差不多,略
配置yum源
1cat > /etc/yum.repos.d/mariadb-10.3.repo <<EOF
2[mariadb-10.3]
3name = MariaDB-10.3
4#baseurl = http://yum.mariadb.org/10.3/centos7-amd64 # 国外源下载太慢,使用清华源
5baseurl = https://mirrors.tuna.tsinghua.edu.cn/mariadb/yum/10.3/centos7-amd64
6gpgkey = https://yum.mariadb.org/RPM-GPG-KEY-MariaDB
7gpgcheck = 1
8enabled = 1
9EOF
安装MariaDB
1yum -y install MariaDB-server MariaDB-client galera
运行MariaDB
1systemctl enable --now mariadb
修改mysql密码
 1mysql_secure_installation <<EOF
 2
 3y
 4root
 5root
 6y
 7n
 8y
 9y
10EOF
推荐root不对外,创建一个账号允许远程的
1grant all on *.* to myuser@'172.16.10.%' identified by 'mypass';
停止mariadb服务
1systemctl stop mariadb
配置galera
修改配置文件
 1cat > /etc/my.cnf.d/galera.cnf <<EOF
 2[mysqld]
 3skip-name-resolve=1
 4binlog_format=ROW
 5default-storage-engine=innodb
 6innodb_locks_unsafe_for_binlog=1
 7query_cache_size=0
 8query_cache_type=0
 9bind_address=172.16.10.11 # 当前服务器IP
10server-id=11 # 集群唯一
11
12[galera]
13# Mandatory settings
14wsrep_on=ON
15wsrep_provider=/usr/lib64/galera/libgalera_smm.so
16wsrep_cluster_name="galera_cluster" # 集群名称
17wsrep_cluster_address="gcomm://172.16.10.12,172.16.10.12,172.16.10.11" # 第一个IP不要是本机的IP,建议放在集群的最后
18wsrep_node_name=cluster1 # 集群唯一
19wsrep_node_address=172.16.10.11 # 当前服务器IP
20binlog_format=row
21default_storage_engine=InnoDB
22innodb_autoinc_lock_mode=2
23
24wsrep_slave_threads=1
25wsrep_certify_nonPK=1
26wsrep_max_ws_rows=131072
27wsrep_max_ws_size=1073741824
28wsrep_debug=0
29wsrep_convert_LOCK_to_trx=0
30wsrep_retry_autocommit=1
31wsrep_auto_increment_control=1
32wsrep_drupal_282555_workaround=0
33wsrep_causal_reads=0
34innodb_flush_log_at_trx_commit=0
35
36wsrep_sst_method=rsync
37wsrep_sst_auth=root:root #安装mysql时配置的密码
38EOF
运行第一个节点
1galera_new_cluster
其他节点
1systemctl start mariadb
高可用测试
 1mysql -proot
 2Welcome to the MariaDB monitor.  Commands end with ; or \g.
 3Your MariaDB connection id is 10
 4Server version: 10.3.23-MariaDB MariaDB Server
 5
 6Copyright (c) 2000, 2018, Oracle, MariaDB Corporation Ab and others.
 7
 8Type 'help;' or '\h' for help. Type '\c' to clear the current input statement.
 9
10MariaDB [(none)]> show status like "wsrep_cluster%";
11+--------------------------+--------------------------------------+
12| Variable_name            | Value                                |
13+--------------------------+--------------------------------------+
14| wsrep_cluster_conf_id    | 3                                    |
15| wsrep_cluster_size       | 3                                    |
16| wsrep_cluster_state_uuid | 9915ed7c-a982-11ea-b110-be6fe46bafbd |
17| wsrep_cluster_status     | Primary                              |
18| wsrep_cluster_weight     | 3                                    |
19+--------------------------+--------------------------------------+
205 rows in set (0.001 sec)
21
22MariaDB [(none)]> show status like 'wsrep_incoming_addresses';
23+--------------------------+-------------------------------------------------------+
24| Variable_name            | Value                                                 |
25+--------------------------+-------------------------------------------------------+
26| wsrep_incoming_addresses | 172.16.10.11:3306,172.16.10.12:3306,172.16.10.13:3306 |
27+--------------------------+-------------------------------------------------------+
281 row in set (0.001 sec)
29
30
31MariaDB [(none)]> create database mydb character set utf8;
32Query OK, 1 row affected (0.007 sec)
可以看到3个节点都在集群中了,并观察其他节点的数据库情况
HAProxy
安装HAProxy
1yum -y install haproxy
配置HAProxy
 1cat > /etc/haproxy/haproxy.cfg <<EOF
 2global
 3    log         127.0.0.1 local2
 4
 5    chroot      /var/lib/haproxy
 6    pidfile     /var/run/haproxy.pid
 7    maxconn     4000
 8    user        haproxy
 9    group       haproxy
10    daemon
11
12    # turn on stats unix socket
13    stats socket /var/lib/haproxy/stats
14
15defaults
16    mode tcp
17    maxconn 10000
18    timeout  connect 10s
19    timeout  client 1m
20    timeout  server 1m
21    timeout  check 10s
22
23listen stats
24    mode          http
25    bind          0.0.0.0:8080
26    stats         enable
27    stats         hide-version
28    stats uri     /haproxy
29    stats realm   Haproxy\Statistics
30    stats admin if TRUE
31    stats auth    admin:admin
32    stats refresh 10s             10000
33
34frontend  vip-mariadb
35    bind 0.0.0.0:3306
36    timeout client 90m
37    default_backend             mariadb
38
39backend mariadb
40    option httpchk
41    option tcpka
42    stick-table type ip size 1000
43    stick on dst
44    timeout server 90m
45    option mysql-check user haproxy
46    server  mariadb1 172.16.10.11:3306 check inter 1s
47    server  mariadb2 172.16.10.12:3306 check inter 1s
48    server  mariadb3 172.16.10.13:3306 check inter 1s
49EOF
MariaDB创建一个无密码无任何权限的haproxy账户
1CREATE USER 'haproxy'@'172.16.10.%';
一定要创建一个用户用于探测mariadb的存活状态用的,不然连接的时候会提示“‘handshake: reading initial communication packet’, system error: 11”错误。
Pacemaker
安装Pacemaker
1yum -y install pcs pacemaker corosync
运行Pacemaker
1systemctl enable --now pcsd
配置Pacemaker集群
为hacluster设置密码
1id hacluster
2uid=189(hacluster) gid=189(haclient) groups=189(haclient)
3
4passwd hacluster
5Changing password for user hacluster.
6New password:
7BAD PASSWORD: The password contains the user name in some form
8Retype new password:
9passwd: all authentication tokens updated successfully.
创建Pacemaker集群
在lvs的其中一个节点执行就行
 1pcs cluster auth lvs1 lvs2
 2Username: hacluster
 3Password: # 输入之前创建的密码
 4lvs1: Authorized
 5lvs2: Authorized
 6
 7pcs cluster setup --name pcs_cluster lvs1 lvs2
 8Destroying cluster on nodes: node4, node5...
 9lvs1: Stopping Cluster (pacemaker)...
10lvs2: Stopping Cluster (pacemaker)...
11lvs1: Successfully destroyed cluster
12lvs2: Successfully destroyed cluster
13
14Sending 'pacemaker_remote authkey' to 'lvs1', 'lvs2'
15lvs1: successful distribution of the file 'pacemaker_remote authkey'
16lvs2: successful distribution of the file 'pacemaker_remote authkey'
17Sending cluster config files to the nodes...
18lvs1: Succeeded
19lvs2: Succeeded
20
21Synchronizing pcsd certificates on nodes node4, node5...
22lvs1: Success
23lvs2: Success
24Restarting pcsd on the nodes in order to reload the certificates...
25lvs1: Success
26lvs2: Success
27
28# 设置集群所有服务器开启
29pcs cluster start --all
30lvs1: Starting Cluster (corosync)...
31lvs2: Starting Cluster (corosync)...
32lvs1: Starting Cluster (pacemaker)...
33lvs2: Starting Cluster (pacemaker)...
34
35# 设置集群中所有服务器自动开启
36pcs cluster enable --all
37lvs1: Cluster Enabled
38lvs2: Cluster Enabled
39
40# 查看pcs状态
41pcs status
42Cluster name: pcs_cluster
43
44WARNINGS:
45No stonith devices and stonith-enabled is not false
46
47Stack: corosync
48Current DC: lvs2 (version 1.1.21-4.el7-f14e36fd43) - partition with quorum
49Last updated: Mon Jun  8 20:35:01 2020
50Last change: Mon Jun  8 20:34:44 2020 by hacluster via crmd on lvs2
51
522 nodes configured
530 resources configured
54
55Online: [ lvs1 lvs2 ]
56
57No resources
58
59
60Daemon Status:
61  corosync: active/enabled
62  pacemaker: active/enabled
63  pcsd: active/enabled
禁用stonith警告
1pcs property set stonith-enabled=false
忽略2节点的quorum功能
1pcs property set no-quorum-policy=ignore
创建Pacemaker集群HAProxy集群资源
1pcs resource create lb-haproxy systemd:haproxy --clone
创建Pacemaker集群虚拟IP资源
1pcs resource create vip-mariadb IPaddr2 ip=172.16.10.10 \
2    cidr_netmask=32 nic=ens33 op monitor interval=30s
3Assumed agent name 'ocf:heartbeat:IPaddr2' (deduced from 'IPaddr2')
4
5pcs constraint order start vip-mariadb then lb-haproxy-clone kind=Optional
6Adding vip-mariadb lb-haproxy-clone (kind: Optional) (Options: first-action=start then-action=start)
7
8pcs constraint colocation add vip-mariadb with lb-haproxy-clone
检查状态
 1pcs status
 2Cluster name: pcs_cluster
 3Stack: corosync
 4Current DC: lvs2 (version 1.1.21-4.el7-f14e36fd43) - partition with quorum
 5Last updated: Mon Jun  8 21:01:13 2020
 6Last change: Mon Jun  8 21:00:32 2020 by root via cibadmin on lvs1
 7
 82 nodes configured
 93 resources configured
10
11Online: [ lvs1 lvs2 ]
12
13Full list of resources:
14
15 Clone Set: lb-haproxy-clone [lb-haproxy]
16     Started: [ lvs1 lvs2 ]
17 vip-mariadb	(ocf::heartbeat:IPaddr2):	Started lvs1
18
19Daemon Status:
20  corosync: active/enabled
21  pacemaker: active/enabled
22  pcsd: active/enabled
看到pacemaker集群已经运行起来
集群测试
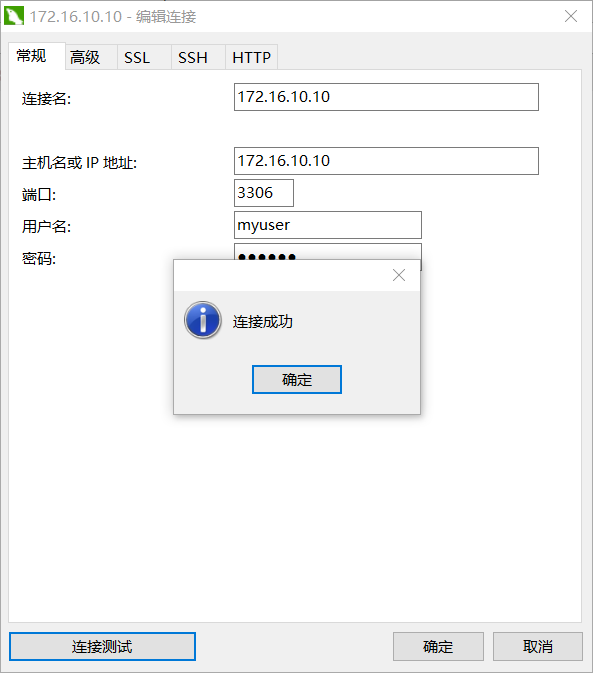
使用mysql客户端连接测试
 1mysql -h 172.16.10.10 -uroot -proot
 2Welcome to the MariaDB monitor.  Commands end with ; or \g.
 3Your MariaDB connection id is 1305
 4Server version: 10.3.23-MariaDB MariaDB Server
 5
 6Copyright (c) 2000, 2018, Oracle, MariaDB Corporation Ab and others.
 7
 8Type 'help;' or '\h' for help. Type '\c' to clear the current input statement.
 9
10MariaDB [(none)]>
navcat
haproxy
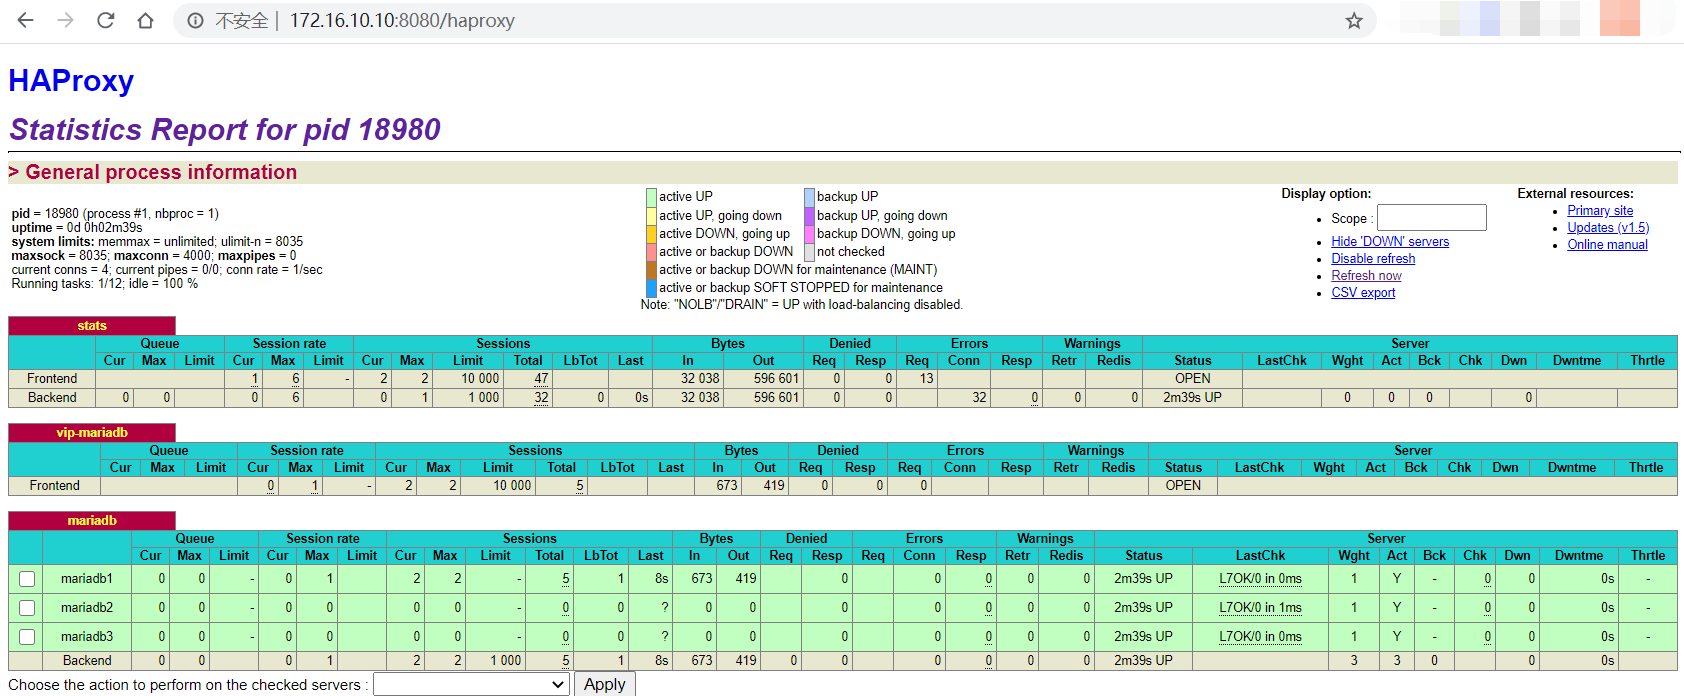
尝试关闭任意两个节点的MariaDB,通过haproxy节点可以看到实时的状态信息,只有一个MariaDB节点的情况下,MariaDB依然能够正常工作。
- 原文作者:黄忠德
- 原文链接:https://huangzhongde.cn/post/Linux/MariaDB_HA_Galera_with_haproxy_and_pacemaker/
- 版权声明:本作品采用知识共享署名-非商业性使用-禁止演绎 4.0 国际许可协议进行许可,非商业转载请注明出处(作者,原文链接),商业转载请联系作者获得授权。